
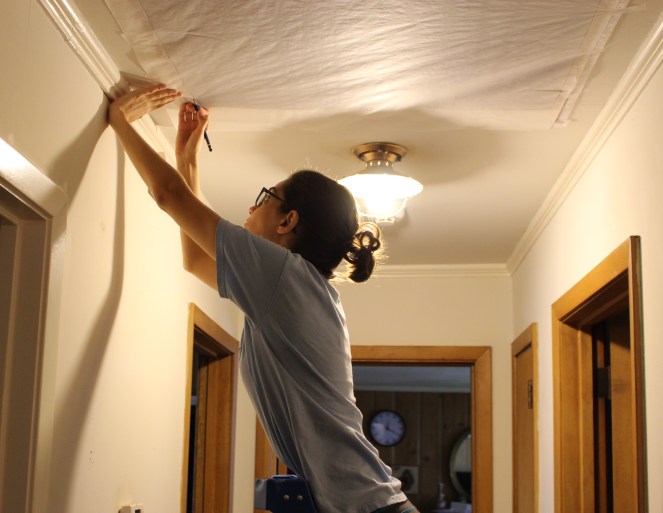
I last left you with a large hole in my ceiling being covered by poster board.
It may have taken a while (3 attempts, but who’s counting) but I am happy to report that I am writing this post sans poster board.
After A LOT of discussion of how we wanted to close our new attic access we decided on a door that would operate via hinge and close by magnet. There would be no attached ladder because the effort to have a fixed permanent ladder could not be justified by the use. If the attic access would be used 2 a year that would be a stretch. And I can say that having this project complete for close to a year now, this was the right call.
Attempt #1- We devised a plan that we would use a 1/2″ piece of ply wood and cut it according to the sketch I would take of the opening. I took the sketch by taping tracing paper over the opening and outlining the edges. We also purchased hinges, a group of magnets for the closure, and a handle.
The premise on this attempt was correct but the materials chosen were wrong. All of them were so wrong. For starters, the plywood we chose was not suited for finishing projects and was WAY too heavy. The magnets were not nearly strong enough even though they were a group. The door became a hazard that did not fit properly in the opening. It just kind of swung from the hinges creating a whole lot of bad.

We removed this door and placed our poster board back over the opening while we regrouped.
Attempt #2- We decided we needed a thinner and much lighter weight piece of wood to be our door. We also thought it would need framing around the edges to stabilize everything and add some insulating properties. In an attempt to recycle something from attempt one, we gave the magnets another chance.
Surprise- this too was a fail. Somehow the shape of the wood was very wrong despite the fact that we had traced the opening. The framing was also just wonky for lack of a better term. And the magnets still did not hold the door.
The understatement of the century would be that we were frustrated. A door was consuming way more time then it should. It was also feeling expensive and very wasteful as we were having to scrap a lot of perfectly good wood that was just in weird shapes and sizes.
We regrouped. We discussed. We came up with a new plan.
Attempt #3- We got a 1/8′ piece of finishing plywood for the face of the door and 1*2 boards to add as framing to the back. We purchased sticky back insulation, a much stronger magnet, and correct hinges.
To get the shape of the door to be exact I measured door #2 against the opening and transferred adjustments accordingly to our new piece of wood. We cut the 1*2s to size and nailed them in place. We fit checked the door before attaching anything further and realized our opening was part of the fit issue.
The original ceiling of our house was tongue and groove. At some point a previous owner had sheet rocked the ceiling. This was fine, but the tongue and groove under the sheetrock had been cut very jagged and was protruding in certain areas. To fix this, because we were determined to make door #3 fit, we got our wood files out and got to work. We ended up filing down a lot of the opening edge to make it flush with the sheetrock and leave a perfect 1/8″ clearance around the edges. To date, I will say that my 2 least favorite tasks tie in at sanding and filing. They are both messy, tiresome, and just a general pain in the ass. However, they are a necessary evil for a good end product.
We rechecked our fit and were good to go! At this point we added 1*2s around the opening of the attic to allow for a tight fit, doubled up the layer of boards on the front and back of the door to give more surface for the screws from the hinges and magnet to dig into, attached insulation to the back of the door frame edges, and attached our hinges. We were in business and ready to hang our door!
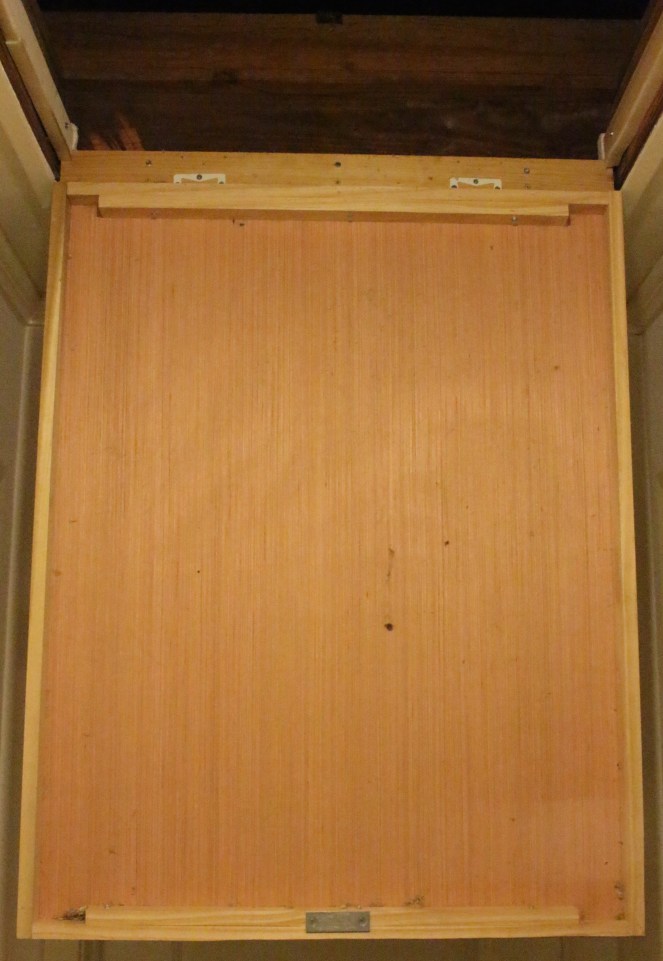

This time we were able to actually hang our door and have it stay up! Yay! No swinging danger, but an actual closure that blended into our ceiling and operated just the way we envisioned! Success! To complete the project we added finishing molding around the outside edge and called it complete!
It felt like a real pat on the back when we called the electricians back to do the job in the bathroom that originally sparked this whole project and he complimented us on our ingenuity!

